I’ve nearly got the design for the memory cards done and ready to share but once that’s out the way it’ll be time to get on with some construction again. With that in mind I cracked out the credit cards and got buying more relays plus some other bits and bobs and whilst I was in a spending mood I decided it was high time to treat the computer to some more laser cut parts.
The two displays (A and B) in the upper enclosure have been looking a bit ‘unfinished’ and it was always my intention to get some laser cut panels made up eventually which would surround the switches and LEDs and give it a more ‘polished’ look. Additionally the panels would also carry an engraved legend to explain what each group of switches/LEDs represents in the displays. The process for making these is just the same as before when I got the laser cut panel for the primary switches.
As before I’ve chosen to get my laser cutting done through RazorLab who provide starter templates for Adobe Illustrator, InkScape and Corel Draw … in my case, being as I’m a cheapskate, I’ve gone with the open source InkScape application. Regardless of the application you end up using though the process is pretty much identical. The laser will cut the material wherever you place a blue line. If you want to engrave the material you use a magenta, green or red line to get a light, medium or heavy line accordingly. Finally if you want to have a ‘raster engraved’ area you fill a shape with grey … the darker the shade the deeper/heavier the engraving. For the text you just type it up as normal with the font size and face of your choice and then convert it to paths so that it’s just a collection of lines and curves like anything else … needless to say that before you convert the text you should do a spell check.
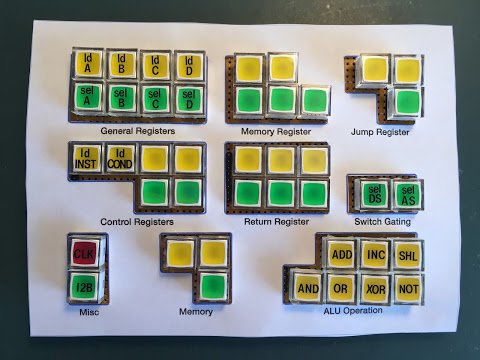
The key thing with finalising a design for laser cutting is to prototype in paper first … keep trying it … refine the design and try it again. Keep going round in this loop until your design is perfect as once it’s been sent off to be cut there’s no going back. Here’s a picture of Display A with the paper prototype panel in place:
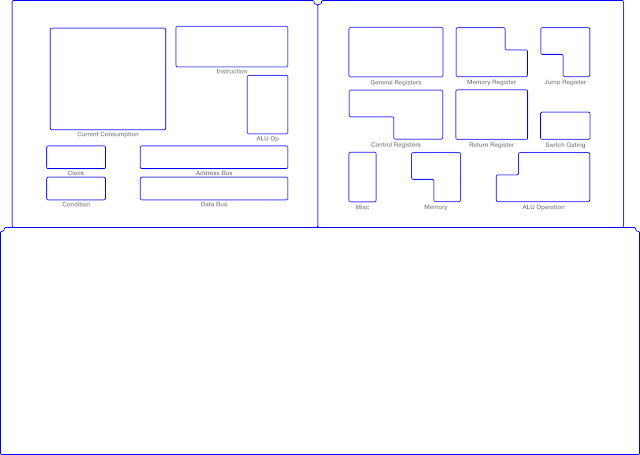
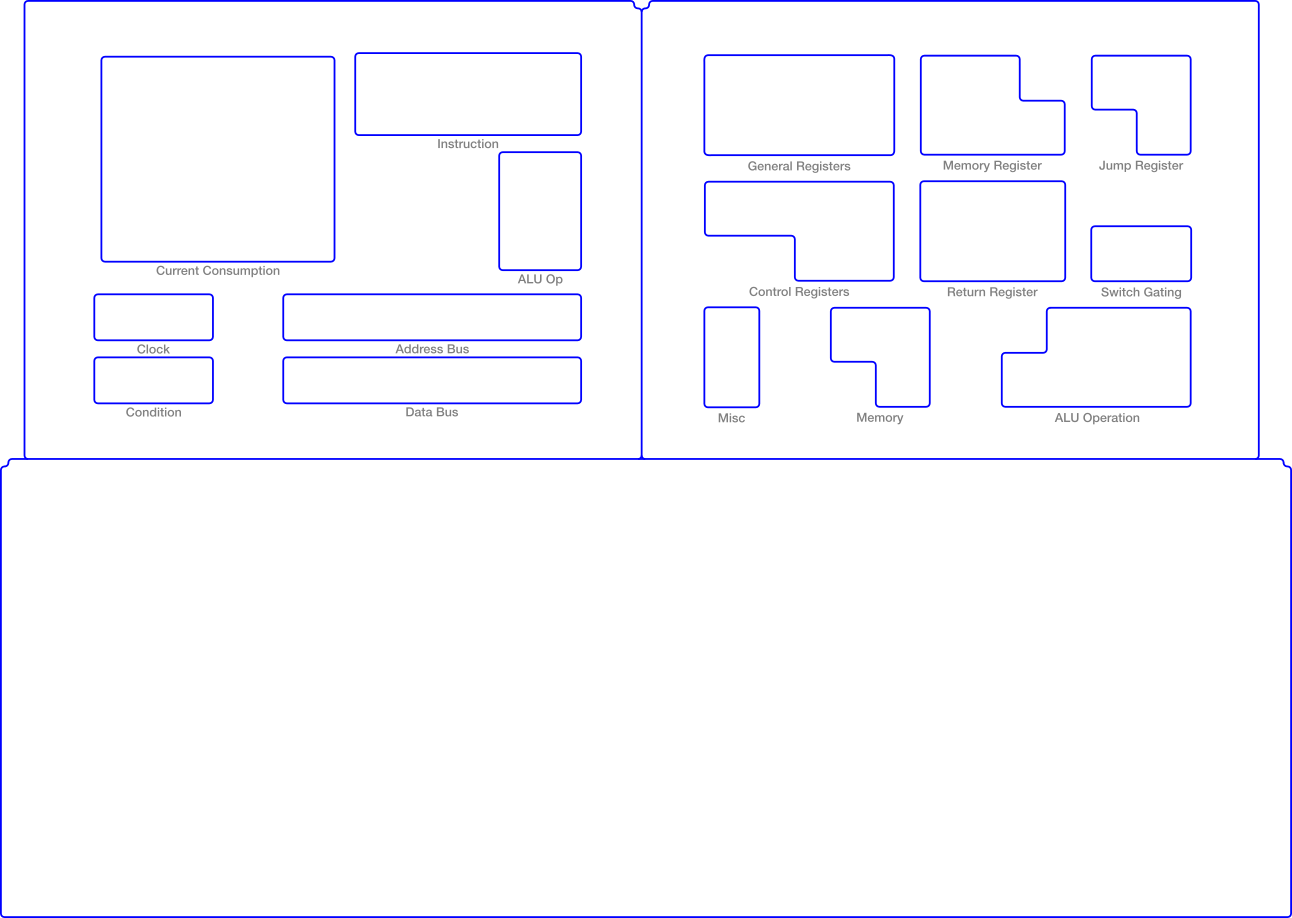
… and here is the design itself (in which I’ve thickened up all the cutting lines to 0.5mm so it’s easier to see them whereas in the original file that goes over to RazorLab the lines must be 0.01mm):
So then, you upload the files to RazorLab, choose your material, cross their palms with silver and then you wait for a knock on the door from Royal Mail (if you live in the UK that is). Actually this time around RazorLab turned the order around in three days which is pretty impressive. I think last time it took a couple of weeks so not sure if I’ve just caught them at a quieter time or if they’ve got more machines spreading the workload. When that parcel does arrive you get to experience that magic/frantic moment where you open it up and get confirmation if your design was right, if your material choice was the right one and if it made it through the post in one piece. To capture that ‘special’ moment I’ve put together a video which also shows what I do with the panels afterwards:
That’s it for this post … hopefully the video has given you a bit of an insight to making laser cut parts (it’s the sort of thing you really need to see rather than read about I think). In my next post I’ll cover the design of the memory cards (yup, I know I said that last time too). In the meanwhile I’ve treated myself to a couple of days off work. The first half of day 1 you’ve seen in the video above but in the second half I soldered the LEDs down on the program counter, incrementer and memory cards. In my second day off I’ll carry on constructing those cards and I’ll share some pictures and details about that in a future post.